



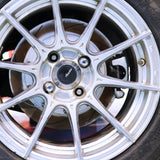


ダイレクトマウント リアキャリパー
30mmピストン1基とダストブーツを備えたリアダイレクトマウント鋳造キャリパーで、日常使用の信頼性を確保。
ダイレクトマウントシリーズ · リアアクスル · シングルピストンディスクキット
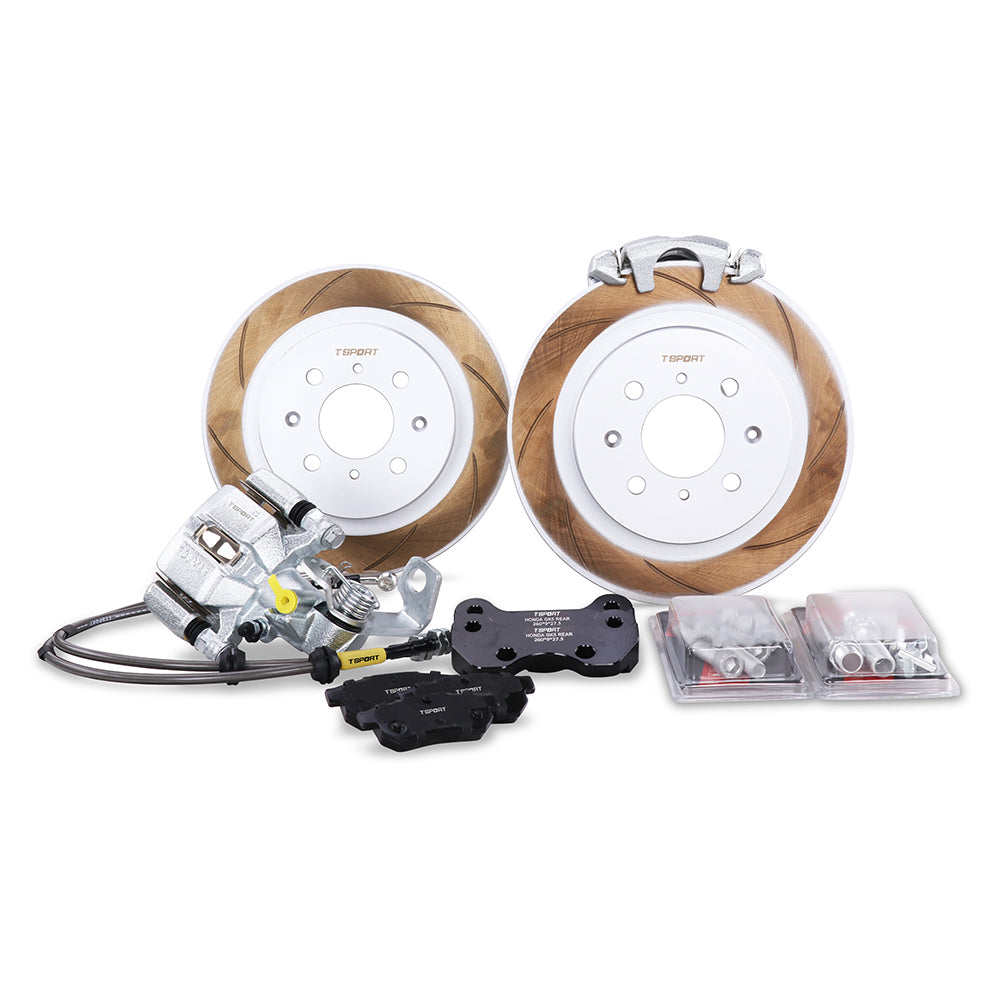
リアアクスルのバランスこそが、フロントビッグブレーキキットを真に機能させる鍵です。このTTSPORT ダイレクトマウントシリーズのリア用シングルピストンディスクキットは、鋳造リアキャリパー、Ø260 / Ø280 mm × 9 mm ソリッド方向性ローター、車種専用ステンレスメッシュブレーキラインでHonda Fit / Jazzをアップグレードします。
GE / GG、GK / GH / GP、GR / GS のFit / Jazz プラットフォーム向けに設計されており、強化フロントブレーキに合わせたリアディスク構成、スポーティな街乗り、オートクロス的な走行、よりクリーンなリアブレーキ換装に適しています。
30mmピストン1基とダストブーツを備えたリアダイレクトマウント鋳造キャリパーで、日常使用の信頼性を確保。
ソリッド Ø260 または Ø280 mm × 9 mm ハイカーボンリアローター、左右方向性、Curved slot / Grain Slot フェイスパターン。
強化フロントブレーキパッケージを補完し、リアアクスルをオーバーパワーにしないよう設計。
3層構造のPTFE / SUS304 / PVCブレーキラインがホースの膨張を抑え、リアペダルレスポンスをより確実にします。
パッドは0~600°C、平均μ 0.38に対応し、鋳鉄 / スチールローターでの日常走行やスポーティな使用に適しています。
15インチ以上のホイール、スポーククリアランス最低42 mm以上に対応する設計です。
| ブレーキキャリパー | ||
|---|---|---|
| シリーズ | ダイレクトマウントシリーズ | |
| モデル / 適合 | ホンダ フィット / ジャズ リアディスクブレーキ | |
| アクスル位置 | リア | |
| ピストン数 | 1ピストン | |
| ピストンタイプ | ダストブーツ付き一体型ピストン | |
| ピストン径 | 30 mm × 1 | |
| キャリパー寸法 | 長さ156 mm × 幅133 mm × 高さ89 mm | |
| ピストン総面積 | キャリパー1基あたり7.1 cm²(全ピストン合計) | |
| 製造プロセス | 鋳造製 | |
| 正味重量 | キャリパー1基あたり2.10 kg(パッド除く) | |
| 表面仕上げ | 電着塗装 | |
| 推奨ホイールサイズ | 15インチ以上 | |
| 推奨ローターサイズ | Ø260〜280 mm × 9 mm | |
| ブレーキローターオプション | ||
| ローターオプション | 260 mm リアローター | 280 mm リアローター |
| ローター素材 | 熱処理高炭素鋳鉄 | 熱処理高炭素鋳鉄 |
| アクスル位置 | リア | リア |
| ローター寸法 | Ø260 mm × 9 mm | Ø280 mm × 9 mm |
| 構造 | 一体型ローター | 一体型ローター |
| ベンチレーション | しっかり | しっかり |
| ローター取付方式 | 固定式 | 固定式 |
| 方向性設計 | はい — 左右専用 | はい — 左右専用 |
| ローター表面パターン | 曲面スロット / グレインスロット | 曲面スロット / グレインスロット |
| ブレーキパッド | ||
| 対応ローター材質 | アイアン/スチールローター専用 | |
| 使用温度範囲 | 0~600℃ | |
| 平均摩擦係数 | 平均μ:0.38、変動は温度、ライン圧、ローター状態に依存します | |
| ブレーキライン | ||
| ブレーキライン構造 | 3層補強構造 | |
| ブレーキライン材質 | PTFEインナーライナー/SUS304ステンレススチールブレード/PVC保護外装シース | |
| ブレーキラインフィッティング | 車種専用フィッティング。キャリパー側とシャシー側のフィッティングは適合により異なります | |
| 車両適合 & ローター対応表 | ||
| 2009-2014 ホンダ フィット / ジャズ(GE / GG) | リア · Ø260 / Ø280 mm × 9 mm | |
| 2014-2020 ホンダ フィット / ジャズ(GK / GH / GP) | リア · Ø260 / Ø280 mm × 9 mm | |
| 2020-2026 ホンダ フィット / ジャズ(GR / GS) | リア · Ø260 / Ø280 mm × 9 mm | |
| 適合・取り付け | ||
| 主要適合車種 | ホンダ フィット / ジャズ | |
| モデル年式 & シャシコード | 2009-2014 GE / GG · 2014-2020 GK / GH / GP · 2020-2026 GR / GS | |
| アクスル | リア | |
| キャリパー取付タイプ | ダイレクトマウント | |
| 最小ホイールサイズ | 15インチ以上 | |
| スポーク最小クリアランス | 42 mm | |
| リアハブ / パーキングブレーキに関する注意 | フィット / ジャズの世代により、グレード別のリアハブ、ナックルレイアウト、ブレーキライン接続、パーキングブレーキ構成が異なります | |
| ベッドイン(慣らし)手順 | 必須 | |
フィット / ジャズの世代により、グレード別のリアハブおよびパーキングブレーキ構成が異なります。ご注文前に、シャシコード、リアハブ / ナックルレイアウト、ブレーキライン接続、パーキングブレーキ仕様、ローター径、ホイールクリアランスをご確認ください。
ダストブーツ付きのリア用ダイレクトマウント鋳造シングルピストンキャリパー ×2。
両側のリアキャリパー用ブレーキパッド。0~600 °C対応、鋳鉄/スチールローター用。
Ø260またはØ280 mm × 9 mmの一体型ソリッド方向性リアローター ×2。
車種専用のキャリパー側・車体側フィッティングを備えたステンレススチールメッシュ製リアブレーキライン ×2。
本製品はダイレクトマウント式のリアディスクキットです。特定のコンバージョン用途で別途車種専用ハードウェアの確認が必要な場合を除き、この構成ではローターキャップ(ハット)や汎用キャリパーブラケットは使用しません。
リアディスク化およびパーキングブレーキ関連作業には、正しい適合確認が必要です。ご注文前に、シャシコード、リアハブ/ナックルレイアウト、ブレーキライン接続、パーキングブレーキ仕様、ローター径、ホイールクリアランスをご確認ください。

15インチ以上のホイールが必要です。

スポーククリアランス最小:42 mm。

ホンダ フィット / ジャズのシャシコード(GE / GG、GK / GH / GP、GR / GS)を確認してください。
ホイール径だけではキャリパーのクリアランスは保証されません。ご注文前に、スポーク形状、リアハブ/ナックルレイアウト、パーキングブレーキ構成、ブレーキラインのフィッティング形状をご確認ください。
このリアディスクブレーキキットは、ホンダ フィット/ジャズのGE/GG、GK/GH/GP、GR/GSシャシコード用に設計されています。リアハブ、ナックルレイアウト、ブレーキラインフィッティング、パーキングブレーキ仕様はグレードや市場によって異なるため、ご注文前に正確な構成をご確認ください。
リアディスクキットです。お車がリアドラム仕様の場合、追加のコンバージョンハードウェアとパーキングブレーキ配索の変更が必要になる場合があります。シャシーコード、リアハブの写真、パーキングブレーキのレイアウトをお送りいただければ、TTSPORTがお車に必要な仕様を確認します。
15インチ以上のホイールが必要で、リアキャリパーとのスポーククリアランスは最低42 mm以上確保してください。ホイールのオフセット、スポーク形状、バレルデザインによって実際のクリアランスは変わります。
260 mmは純正出力のストリート仕様や、ホイールクリアランスが厳しい構成に適しています。280 mmはリアの熱容量が増し、フロントブレーキを強化する場合により適した組み合わせです。ただし、ホイールと用途に応じたクリアランスの確認が必要です。
キット内容:リア用ダイレクトマウント鋳造シングルピストンキャリパー×2、リアキャリパー用ブレーキパッド×2組、Ø260またはØ280 mm×9 mmの一体型ソリッド方向性リアローター×2、車種別フィッティング付きステンレスメッシュリアブレーキホース。
はい。リアブレーキとパーキングブレーキの作業は安全性に直結します。資格を持つ整備士が取り付け、トルク管理、エア抜き、慣らし(ベッドイン)を行う必要があります。
はい。パッド材をローター面に均一に転写し、激しい走行の前に制動性能を安定させるため、適切な慣らし(ベッドイン)が必要です。
シャシーコード、リアハブレイアウト、パーキングブレーキ仕様、ローターサイズ、ホイールクリアランスの確認でお困りですか?
Brake Kits · Fitment · Installation · Care Guide
A brake kit is not just a pair of larger calipers. Calipers, rotors, pads, hoses, brackets, rotor hats, mounting hardware, brake fluid, wheel clearance, and bedding procedure all work together as one system.
This guide explains how to confirm the right TTSPORT brake kit before ordering, what to check before installation, and how to care for the system after installation.
Do not order a brake kit by vehicle name alone. The correct kit depends on the vehicle, axle position, wheel package, driving use, and brake system layout.
Wheel Clearance & Data Disclaimer: Technical fitment data applies strictly to rotor hats and mounting brackets—not wheel geometry. Wheel compatibility specs are provided for general reference only. Insufficient wheel clearance is not covered under warranty or data accuracy claims; if clearance is insufficient, wheel spacers must be added at the customer's discretion.
Different TTSPORT brake kit series use different hardware layouts. Always confirm what the kit includes before purchase.
Use direct-mount calipers and one-piece rotors where specified. These kits do not use rotor hats or caliper brackets unless the final product page clearly states otherwise.
Use separate friction rings and rotor hats. Hat offset, ring bolt pattern, hardware style, and rotor direction must be matched correctly.
May require bespoke brackets, rotor hats, brake lines, and engineering confirmation based on knuckle, hub, wheel, and competition use.
Require extra attention to wheel clearance, tire size, vehicle load, descent control, hose routing, and dust / water exposure.
Do not assume every brake kit includes the same parts. Package contents vary by product series, vehicle application, and final order configuration.
Before finalizing the order, review the kit specification carefully. Confirm the brake kit is matched to your vehicle and wheel setup, not only to the model name.
If any part is not listed in the final order or product page, do not assume it is included.
Inspect every component before installation. Do not modify, grind, drill, stretch, force, or space brake kit components to make them fit.
Safety: Brake kits affect braking force, hydraulic sealing, heat control, wheel clearance, and vehicle stability. Do not install the kit if fitment, torque, direction, clearance, or compatibility is unclear.
Correct installation is as important as the brake kit itself. A properly engineered kit can still perform poorly if installed with dirty mounting faces, incorrect torque, poor hose routing, or trapped air in the hydraulic system.
Verify caliper centering over the rotor and confirm even pad sweep across the friction surface.
Confirm left / right rotor direction if the rotor uses directional vanes or directional face pattern.
Check brake hose length and routing at full steering lock and full suspension travel. No twisting, rubbing, stretching, or kinking.
Check caliper-to-spoke and caliper-to-barrel clearance before road use. Wheel specs are for general estimation only—clearance issues are excluded from warranty/data claims and may require user-supplied wheel spacers.
Use the correct brake fluid type and bleed the system until pedal feel is firm and consistent.
Torque all brake hardware to the specified value. Do not reuse damaged, unknown, stretched, or corroded safety-critical fasteners.
Brake pads and rotors need a controlled bedding process before full performance is available. Bedding helps create an even transfer layer on the rotor surface, improving bite, pedal consistency, and vibration resistance.
Street pads, race pads, iron rotors, two-piece rotors, and carbon ceramic rotors may require different bedding procedures. Use the procedure supplied with the specific kit.
After installation and bedding, give the system a short break-in period before aggressive use. Pedal feel, pad contact, dust output, and noise may continue to settle after the first drives.
Brake kits need regular inspection, especially after track use, off-road use, towing, mountain driving, winter salt exposure, or any brake service.
Inspect pads, rotors, fluid level, and hose condition during normal service intervals. Prioritize quiet operation, smooth pedal feel, and even wear.
Check pad thickness, rotor surface condition, and fluid condition more often. Long descents create sustained heat even without track use.
Inspect for mud, sand, stone impact, hose abrasion, dust boot damage, and caliper contamination after trail use.
Inspect pads, rotors, fluid, and hardware before and after every event. Track heat shortens service intervals.
Check rear brake temperature, hydraulic handbrake behavior, pad wear, rotor cracking, and hardware condition frequently.
Use only compatible pads and approved bedding procedures. Inspect rotor surface condition carefully and avoid incompatible friction materials.
Do not continue driving if the brake system shows any of the following symptoms. Inspect the system or contact a qualified brake technician before using the vehicle again.
Send your vehicle details, brake kit series, wheel specs, driving use, photos, and any symptoms you notice. TTSPORT will help confirm fitment, installation checks, and the correct care path for your brake kit.
購読ありがとうございます!
このメールアドレスは登録されました!