

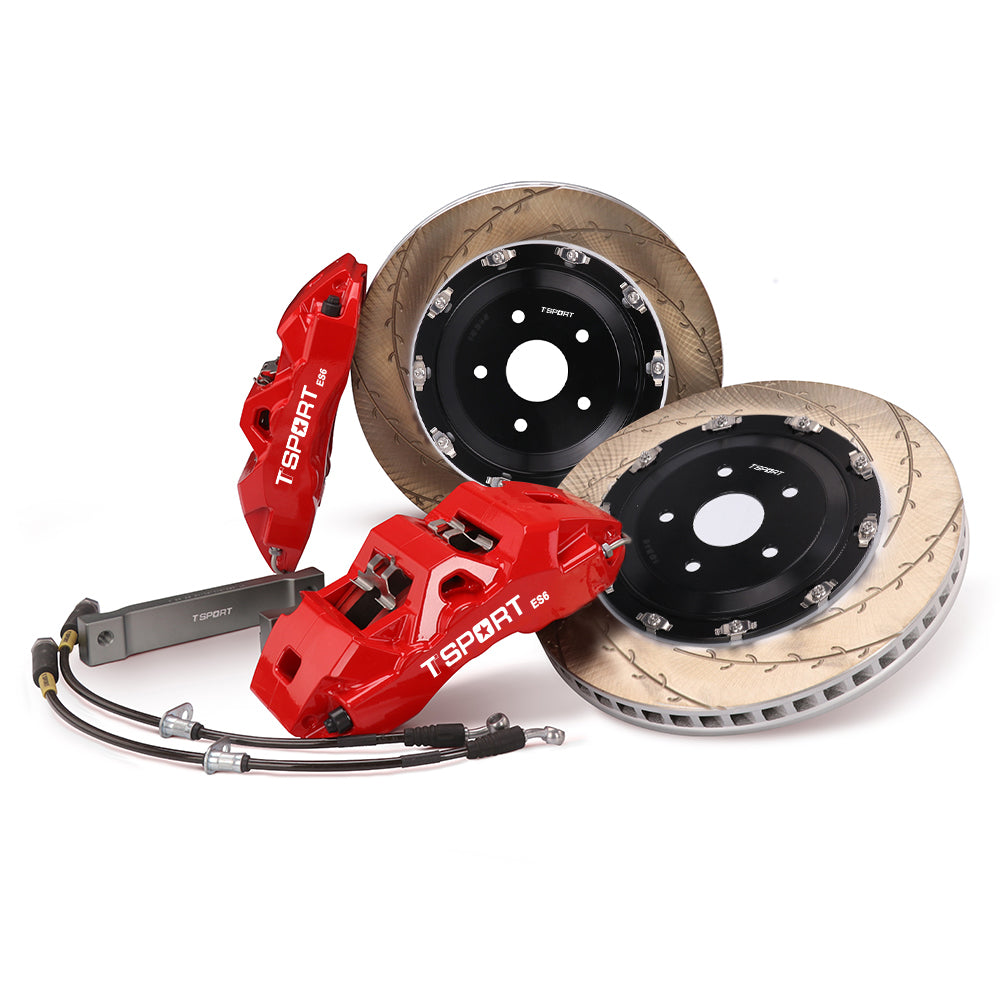


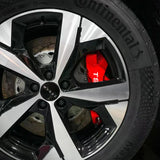


2ピース鍛造アルミキャリパー
鋳造ボディよりも高い剛性重量比を実現し、荷重下でのたわみを低減して鋭いペダルレスポンスを発揮します。
Evolutionシリーズ ・ フロントアクスル ・ 6ピストン鍛造
2ピース鍛造6ピストンキャリパー、32mmの2ピースローターセット、そしてマッチングされたフリクションを核とした、プラットフォーム適合のフロントビッグブレーキアップグレード。ES6は、より確かなペダルフィール、鋭い初期制動、そしてストリートとサーキットで反復可能な制動力を実現するよう設計されています。
鋳造ボディよりも高い剛性重量比を実現し、荷重下でのたわみを低減して鋭いペダルレスポンスを発揮します。
ローター面全体でパッド荷重をバランスさせるようサイズ設定された6ピストンが、トルクの立ち上がりを滑らかにし、テーパー摩耗を低減します。
CNCアルミハットに32 mmの内部ベンチレーテッド面を採用し、優れた熱容量と低い回転質量を実現。
ホースの膨張を最小限に抑え、熱や連続制動時でもペダルストロークを一定に保ちます。
鋳鉄ローター用とカーボンセラミックローター用のパッドをそれぞれのローター素材に合わせてチューニングし、使用範囲全域で安定したμを実現。
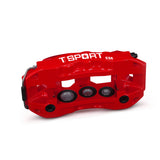
ES6ボディはアルミビレットを2分割で鍛造し、その後機械加工とボルト締結によって単一の剛性アッセンブリーに組み上げています。鍛造は鋳造よりも緻密な結晶粒構造を生み出すため、ラインプレッシャーが急上昇した際もキャリパーのたわみに耐えます。ダストブーツ付きの2ピース断熱ピストンが、パッド裏板からブレーキフルードへの熱伝達を抑え、長時間の走行におけるペダルフェード対策に貢献します。耐高温グロスコーティングが、ブレーキダスト、ロードソルト、紫外線からボディを保護します。
ストリート、キャニオン、初級トラック走行にはアイアンローター仕様を、本格的なトラック走行、ばね下重量の低減、より高いフェード耐性にはカーボンセラミック(CCB)仕様をお選びください。各オプションにはローター素材に適合したフリクションコンパウンドが付属します — アイアンローターにはアイアンパッド、CCBローターにはセラミック専用パッド。異なる素材の組み合わせには対応していません。
| ブレーキキャリパー | ||
|---|---|---|
| シリーズ | エボリューションシリーズ | |
| モデル / 適合 | ES6 | |
| アクスル位置 | フロント | |
| ピストン数 | 6ピストン | |
| ピストンタイプ | ダストブーツ付き2ピース断熱ピストン | |
| ピストン径 | 27 mm × 2 / 32 mm × 2 / 38 mm × 2 | |
| キャリパー寸法 | 長さ294 mm × 幅155 mm × 高さ84 mm | |
| ピストン総面積 | キャリパー1基あたり50.2 cm²(全ピストン合計) | |
| 製造プロセス | 2ピース鍛造アルミニウムボディ | |
| 正味重量 | キャリパー1基あたり3.95 kg(パッド除く) | |
| 表面仕上げ | 高温光沢コーティング | |
| 推奨ホイールサイズ | 18インチ以上 | |
| 推奨ローターサイズ | Ø355~380 mm × 32 mm | |
| ブレーキローターオプション | ||
| ローターオプション | アイアン(標準) | カーボンセラミック(オプションB) |
| ローター素材 | 熱処理高炭素鋳鉄 | カーボンセラミック複合材 |
| アクスル位置 | フロント | フロント |
| ローター寸法 | Ø355 / 380 mm × 32 mm | Ø355 / 380 mm × 32 mm |
| 構造 | 2ピースローターアッセンブリ | 2ピースローターアッセンブリ |
| ベンチレーション | 内部ベンチレーション | 内部ベンチレーション |
| ローター取付方式 | 固定式またはフローティング式(ローターサイズおよび車両適合による) | フローティング |
| 方向性設計 | はい — 左右専用 | はい — 左右専用 |
| ローター表面パターン | カーブドスロット / グレインスロット / ウェーブスロット / ドリルド&スロット | クロスドリルド |
| ブレーキパッドオプション | ||
| パッドオプション | アイアンローター用 | CCBローター用 |
| 対応ローター材質 | アイアン/スチールローター専用 | カーボンセラミックローター専用 |
| 使用温度範囲 | 0~600℃ | 0~700℃ |
| 平均摩擦係数 | μ ≈ 0.38(温度、圧力、ローター状態により変動) | μ ≈ 0.45(温度、圧力、ローター状態により変動) |
| ブレーキライン | ||
| ブレーキライン構造 | 3層構造 | |
| ブレーキライン材質 | PTFEインナーライナー / SUS304ステンレスブレード / PVCアウターシース | |
| ブレーキラインフィッティング | 車種別専用。キャリパー側・シャシー側のフィッティングは適合車種により異なる | |
| ブラケット | ||
| ローターキャップ製造方法 | CNC切削加工 | |
| ローターキャップ材質 | 高強度アルミニウム合金 | |
| キャリパーブラケット製造方法 | CNC切削加工 | |
| キャリパーブラケット材質 | 炭素鋼 | |
| キャリパー取付タイプ | 車種別専用ブラケットによるラジアルマウント | |
| 適合・取り付け | ||
| スポーク最小クリアランス | 99 mm | |
| 推奨ホイールサイズ | 18インチ以上 | |
| ベッドイン(初期なじみ) | 取り付け後に必須 | |
鍛造6ピストンキャリパー2基。
両キャリパー用の完全マッチング済みフロントパッドセット。
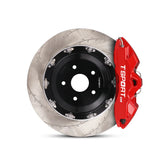
CNCアルミハット付きの2ピース 355 mm または 380 mm × 32 mm ローター 2枚。
お客様の車両に合わせたCNCカーボンスチール製ラジアルマウントブラケット 2個。
CNCアルミハット×2。
ステンレススチールメッシュブレーキライン 2本。
本キットはプラットフォーム適合キットです。ご注文前に、車両の年式、メーカー、モデル、グレード、ホイール径、オフセット、スポーククリアランスをTTSPORTまでご確認ください。

ES6キャリパーは18インチ以上のホイールが必要です。

ES6キャリパーは最低99 mmのスポーククリアランスが必要です。

キャリパーブラケットとブレーキラインのフィッティングはお客様の車両に合わせて製作されるため、ご購入前に年式、メーカー、モデル、グレード、ホイール仕様を弊社チームまでご確認ください。
ES6キャリパーの寸法は長さ294 × 幅155 × 高さ84 mmで、18インチ以上のホイールで最低99 mmのスポーククリアランスが必要です。ホイールデザイン、スポーク形状、オフセットはすべて適合性に影響します。ご購入前にキャリパーの外形とローター径に対するクリアランスを確認することをおすすめします。
ES6フロントキットには、鍛造6ピストンキャリパー×2、CNCアルミハット付き2ピース355mmまたは380mm×32mmローター×2、専用フロントパッドセット、ステンレススチール製メッシュホース、お客様の車両に合わせたCNCカーボンスチール製ラジアルマウントブラケットが含まれます。
ES6キャリパーには18インチ以上のホイールと、最低99mmのスポーククリアランスが必要です。ホイールのオフセット、スポーク形状、ローター径はすべて適合に影響するため、ご注文前にキャリパー外形(長さ294×幅155×高さ84mm)とのクリアランスを必ずご確認ください。
ホイールクリアランスが厳しい場合やばね下重量を重視する日常~スポーティな街乗り用途には355mmをお選びください。サーキット走行、重量車両、高速からの繰り返し制動に対応する最大限の熱容量が必要な場合は380mmをお選びください。
高炭素鋳鉄ローターは、0~600℃対応・平均μ0.38のパッドを使用し、ストリートからサーキットまで優れたコストパフォーマンスを発揮します。CCBオプションは、0~700℃対応・平均μ0.45のカーボンセラミック専用パッドを使用し、ばね下重量が軽く、本格的なサーキット走行でも高い耐フェード性を実現します。
はい。パッド材をローター面に均一に転写し、摩擦層を安定させ、本来の効きとコントロール性を引き出すには、適切な慣らし(ベッドイン)が必要です。この工程を省略すると、パッド材の不均一な付着や振動、ペダルフィールの低下を招くことがあります。
ES6は車種専用に適合させたビッグブレーキキットです。キャリパーブラケットとブレーキラインのフィッティングはお客様の車両に合わせて製作されるため、ご購入前に年式、メーカー、モデル、グレード、ホイールスペックを弊社チームにご確認ください。
お車の詳細とホイールスペックをお送りいただければ、ご注文前にローターサイズ、ブラケット、ラインフィッティングを確認いたします。
Brake Kits · Fitment · Installation · Care Guide
A brake kit is not just a pair of larger calipers. Calipers, rotors, pads, hoses, brackets, rotor hats, mounting hardware, brake fluid, wheel clearance, and bedding procedure all work together as one system.
This guide explains how to confirm the right TTSPORT brake kit before ordering, what to check before installation, and how to care for the system after installation.
Do not order a brake kit by vehicle name alone. The correct kit depends on the vehicle, axle position, wheel package, driving use, and brake system layout.
Wheel Clearance & Data Disclaimer: Technical fitment data applies strictly to rotor hats and mounting brackets—not wheel geometry. Wheel compatibility specs are provided for general reference only. Insufficient wheel clearance is not covered under warranty or data accuracy claims; if clearance is insufficient, wheel spacers must be added at the customer's discretion.
Different TTSPORT brake kit series use different hardware layouts. Always confirm what the kit includes before purchase.
Use direct-mount calipers and one-piece rotors where specified. These kits do not use rotor hats or caliper brackets unless the final product page clearly states otherwise.
Use separate friction rings and rotor hats. Hat offset, ring bolt pattern, hardware style, and rotor direction must be matched correctly.
May require bespoke brackets, rotor hats, brake lines, and engineering confirmation based on knuckle, hub, wheel, and competition use.
Require extra attention to wheel clearance, tire size, vehicle load, descent control, hose routing, and dust / water exposure.
Do not assume every brake kit includes the same parts. Package contents vary by product series, vehicle application, and final order configuration.
Before finalizing the order, review the kit specification carefully. Confirm the brake kit is matched to your vehicle and wheel setup, not only to the model name.
If any part is not listed in the final order or product page, do not assume it is included.
Inspect every component before installation. Do not modify, grind, drill, stretch, force, or space brake kit components to make them fit.
Safety: Brake kits affect braking force, hydraulic sealing, heat control, wheel clearance, and vehicle stability. Do not install the kit if fitment, torque, direction, clearance, or compatibility is unclear.
Correct installation is as important as the brake kit itself. A properly engineered kit can still perform poorly if installed with dirty mounting faces, incorrect torque, poor hose routing, or trapped air in the hydraulic system.
Verify caliper centering over the rotor and confirm even pad sweep across the friction surface.
Confirm left / right rotor direction if the rotor uses directional vanes or directional face pattern.
Check brake hose length and routing at full steering lock and full suspension travel. No twisting, rubbing, stretching, or kinking.
Check caliper-to-spoke and caliper-to-barrel clearance before road use. Wheel specs are for general estimation only—clearance issues are excluded from warranty/data claims and may require user-supplied wheel spacers.
Use the correct brake fluid type and bleed the system until pedal feel is firm and consistent.
Torque all brake hardware to the specified value. Do not reuse damaged, unknown, stretched, or corroded safety-critical fasteners.
Brake pads and rotors need a controlled bedding process before full performance is available. Bedding helps create an even transfer layer on the rotor surface, improving bite, pedal consistency, and vibration resistance.
Street pads, race pads, iron rotors, two-piece rotors, and carbon ceramic rotors may require different bedding procedures. Use the procedure supplied with the specific kit.
After installation and bedding, give the system a short break-in period before aggressive use. Pedal feel, pad contact, dust output, and noise may continue to settle after the first drives.
Brake kits need regular inspection, especially after track use, off-road use, towing, mountain driving, winter salt exposure, or any brake service.
Inspect pads, rotors, fluid level, and hose condition during normal service intervals. Prioritize quiet operation, smooth pedal feel, and even wear.
Check pad thickness, rotor surface condition, and fluid condition more often. Long descents create sustained heat even without track use.
Inspect for mud, sand, stone impact, hose abrasion, dust boot damage, and caliper contamination after trail use.
Inspect pads, rotors, fluid, and hardware before and after every event. Track heat shortens service intervals.
Check rear brake temperature, hydraulic handbrake behavior, pad wear, rotor cracking, and hardware condition frequently.
Use only compatible pads and approved bedding procedures. Inspect rotor surface condition carefully and avoid incompatible friction materials.
Do not continue driving if the brake system shows any of the following symptoms. Inspect the system or contact a qualified brake technician before using the vehicle again.
Send your vehicle details, brake kit series, wheel specs, driving use, photos, and any symptoms you notice. TTSPORT will help confirm fitment, installation checks, and the correct care path for your brake kit.
購読ありがとうございます!
このメールアドレスは登録されました!