

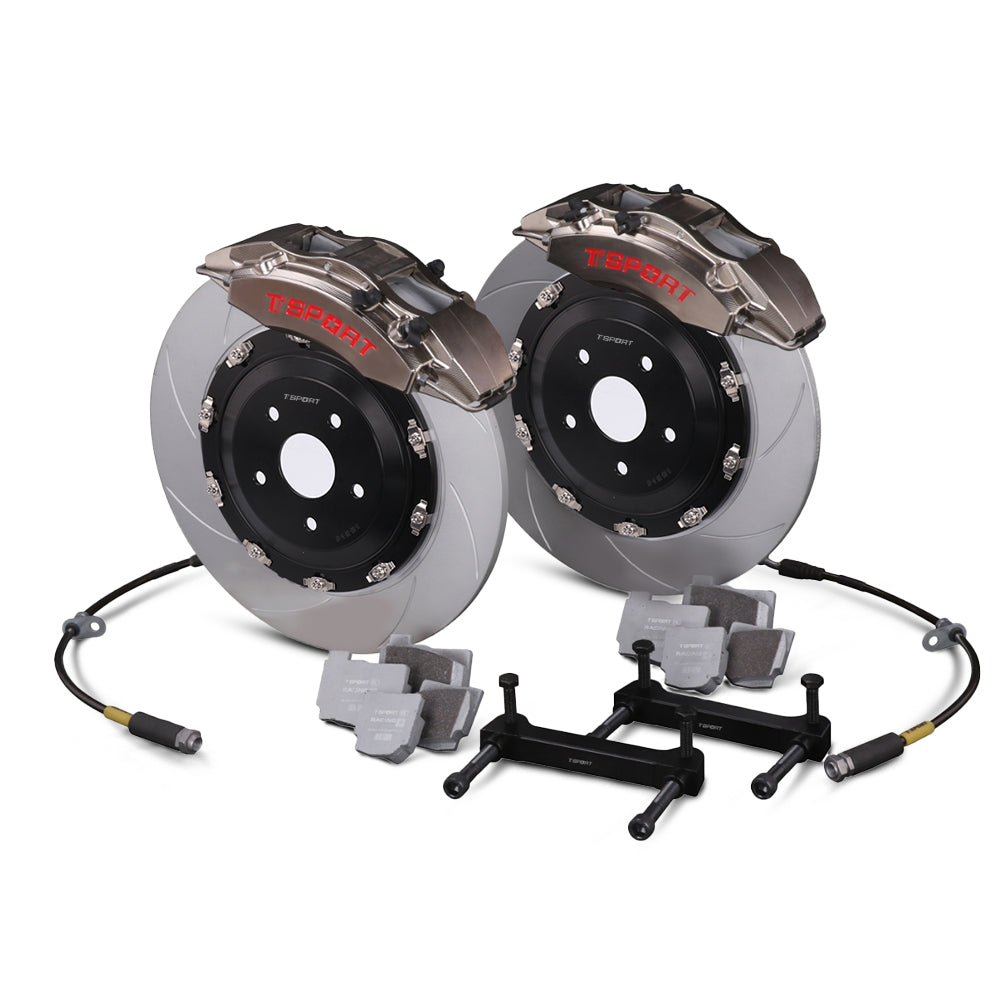


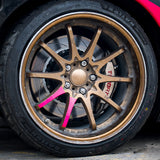


シングルキャリパー/デュアル回路レイアウト
1基の鍛造キャリパーがハンドブレーキとフットブレーキの両回路を担い、セカンダリキャリパーを重ねる方式に比べて搭載レイアウトの複雑さを軽減します。
レーシングシリーズ · ドリフト · リヤアクスル · デュアル回路 6ピストン
DR4+2は、2つの独立した油圧回路を備えた鍛造キャリパー1基を中心に構成されたリア用ドリフトビッグブレーキキットです。一方の回路はハンドブレーキ側、もう一方はフットブレーキ側に使用します。各コーナーにつきキャリパー1基、ローター1枚、ブラケット1基。セカンダリキャリパーを重ねる必要もなく、ペダルとサイドブレーキ間でフルード経路を共有することもありません。
リアナックルに2基目のキャリパーを重ねる方法は機能しますが、重量が増し、ロータークリアランスが複雑になり、ブラケット形状に妥協を強いられます。DR4+2は両方の回路を単一の2ピース鍛造ボディ内に収めているため、ハンドブレーキは必要に応じてリアアクスルをロックでき、フットブレーキはペダルフィールと限界域のモジュレーションのために独立した状態を保ちます。
1基の鍛造キャリパーがハンドブレーキとフットブレーキの両回路を担い、セカンダリキャリパーを重ねる方式に比べて搭載レイアウトの複雑さを軽減します。
ハンドブレーキのライン圧はフットブレーキのペダルフィールに影響を与えないため、リアのロックアップとペダルモジュレーションは分離された状態を保ちます。
各コーナーにラジアルマウントキャリパー1基を採用することで、デュアルキャリパー構成よりもリアアップライトがすっきりし、ブラケット形状もシンプルになります。
2ピース鍛造アルミニウムボディ、キャリパー1基あたり2.50 kg、ニッケルメッキ仕上げ、放熱性とメンテナンス性を追求したブーツレスレーシングピストンを採用。
ハンドブレーキロック、フットブレーキコントロール、そして高温のサーキット環境でも安定したリアの制動力を必要とするリアアクスル向けに設計。
ブラケット形状、ローターキャップのオフセット、ハブレジスター、ハードウェア、ブレーキラインのフィッティングは、生産前に実際の車両(シャシー)に照らして確認されます。
| ブレーキキャリパー | ||
|---|---|---|
| シリーズ | レーシングシリーズ — ドリフト | |
| モデル / 適合 | DR4+2 | |
| アクスル位置 | リア | |
| キャリパーレイアウト | 2系統の独立した油圧回路を内蔵したシングルリアキャリパー | |
| ピストン数 | ハンドブレーキ用ピストン4基+油圧ピストン2基 | |
| ピストンタイプ | ダストブーツなしのレーシングピストン | |
| ピストン径 | 27 mm × 2 / 32 mm × 2 / 38 mm × 2 | |
| キャリパー寸法 | 長さ266mm × 幅118mm × 高さ73mm | |
| ピストン総面積 | キャリパー1基あたり50.2 cm²(全ピストン合計) | |
| 製造プロセス | 2ピース鍛造アルミニウムボディ | |
| 正味重量 | キャリパーあたり2.50 kg(パッド除く) | |
| 表面仕上げ | ニッケルメッキ | |
| 推奨ホイールサイズ | 17インチ以上 | |
| 推奨ローターサイズ | Ø330~343mm × 11.5~12mm | |
| ブレーキローターオプション | ||
| ローターオプション | 330 mm スチール | 343 mm スチール |
| ローター素材 | 熱処理高炭素鋳鉄 | 熱処理高炭素鋳鉄 |
| アクスル位置 | リア | リア |
| ローター寸法 | Ø330 mm × 12 mm | Ø343mm × 11.5mm |
| 構造 | 2ピースローターアッセンブリ | 2ピースローターアッセンブリ |
| ベンチレーション | しっかり | しっかり |
| ローター取付方式 | 固定式 | 固定式 |
| ローター用ハット | CNC切削加工の高強度アルミ合金ローターキャップ | CNC切削加工の高強度アルミ合金ローターキャップ |
| 方向性設計 | はい — 左右専用 | はい — 左右専用 |
| ローター表面パターン | カーブドスロット | カーブドスロット |
| 推奨用途 | 17インチホイールやコンパクトなナックル周りに対応する標準リアドリフトローター | 高速での進入や耐久レースの長時間にわたる熱負荷に対応する大きな制動面積 |
| ブレーキパッド | ||
| 対応ローター材質 | アイアン/スチールローター専用 | |
| 使用温度範囲 | 0~600℃ | |
| 平均摩擦係数 | μ≈0.38、温度、ライン圧、ローターの状態により変動 | |
| パッドウィンドウ | 冷間のスタートから繰り返しの競技走行まで、セッション途中で急激な効き落ちがなく安定したリアの制動力を発揮 | |
| ライン、ブラケット&サービス | ||
| ブレーキライン構造 | 3層強化構造 | |
| ブレーキライン材質 | PTFEインナーライナー / SUS304ステンレスブレード / PVCアウターシース | |
| キャリパー取付 | 車両専用キャリパーブラケットによるラジアルマウント | |
| キャリパーブラケット | CNC切削加工の炭素鋼ラジアルマウントキャリパーブラケット | |
| ローター用ハット | リアハブ形状とローターオフセットに合わせてCNC加工された高強度アルミ合金製ローターキャップ | |
| ブレーキラインフィッティング | 車種専用 — キャリパー側とシャシー側のフィッティングはアプリケーションにより異なります | |
| 回路レイアウト | 1つのキャリパーボディ内に2系統の独立した油圧回路を内蔵。ハンドブレーキラインの圧力はフットブレーキのペダルフィールに影響しません | |
| ホイールクリアランス | 17インチ以上のホイールが必要です。最終的なクリアランスは、ホイールオフセット、スポーク形状、ローター径、リアハブ位置、ブラケット形状によって異なります | |
| ベッドイン(慣らし)手順 | 競技使用前に必要 | |
両ローターサイズとも、CNCアルミキャップ付きの2ピースアッセンブリとして出荷されます。カスタムキャップオフセットとブラケット形状はエンジニアリング工程を通じて対応可能です。最終的なローターの選択はビルドレビュー時に確定します。
DR4+2 リア用2ピース鍛造デュアル回路キャリパー×2(ニッケルメッキ仕上げ)、各リアコーナーに1基ずつ。
両側のリアキャリパー用ブレーキパッド。0~600 °C対応、鋳鉄/スチールローター用。
2× リア用2ピースソリッドローター、Ø330 mm × 12 mmまたはØ343 mm × 11.5 mmから選択、左右専用。
車両専用のCNC削り出しカーボンスチール製ラジアルキャリパーブラケット。リアキャリパーの正確な位置とアライメントを確保します。
CNC削り出しの高強度アルミニウム合金製ローターキャップ。リアハブ形状とローターオフセットに適合。
車両専用のステンレスメッシュリアブレーキライン。PTFEインナーライナー、SUS304メッシュ、PVCアウターシースを採用し、独立した回路に対応。
DR4+2リアドリフトシステムはすべて、車両のリアナックル、ハブ位置、ローターキャップのオフセット、ホイールバレル、スポーククリアランス、油圧ハンドブレーキのレイアウト、ブレーキラインの取り回し、リアブレーキバランスの目標、そしてドリフト、ラリー、タイムアタックでの使用目的に合わせて設計されています。目指すのは汎用品のユニバーサルフィットではなく、ハンドブレーキ圧とフットブレーキ圧を分離しながら、お客様のシャシー形状にぴったり適合するシングルキャリパーのリアパッケージです。
シャシー、リアサスペンションとナックルの構成、リアハブの仕様、油圧ハンドブレーキのレイアウト、目標とするリアブレーキ特性、ホイール構成、タイヤ構成、ブレーキバランス戦略、そして純正かカスタムかのリアアップライトの使用状況を確認します。
純正ナックルの場合は、シャシーの詳細、リアハブの仕様、ホイールサイズ、ホイールオフセット、スポーク形状、ハンドブレーキ配管のレイアウトをご提供ください。カスタムリアアップライトの場合は、CADファイル、技術図面、ハブフェースのデータ、ローター取付寸法、またはキャリパー取付点の正確な測定値をご提供ください。
TTSPORTは生産開始前に、ブラケットの形状、ローターキャップのオフセット、ハブレジスター、ローターサイズ、ハードウェア、ブレーキラインのフィッティング、ホイールクリアランス、パッドのセッティングを確認します。
ホイール、リアナックル、ローターオフセット、油圧ハンドブレーキのレイアウト、ブレーキバランス、ブレーキラインの取り回しが適合するか不明な場合は、 お問い合わせください ご注文前にご連絡ください。エンジニアリングチームがビルドの詳細を確認いたします。
モータースポーツ用途。 ピストンはダストブーツなしで出荷され、パッドはサーキットでの高温用に配合されています。慣らし(ベッドイン)が必要です。このキットはデイリードライバー向けのストリートアップグレードを目的としたものではありません。
いいえ。DR4+2は1つのキャリパー本体内部に2つの独立した油圧回路を備えています。ハンドブレーキのライン圧はフットブレーキのペダルフィールには影響せず、その逆も同様です。
はい、ただしリアのバイアスは変化します。新しいリアピストン面積(キャリパーあたり50.2 cm²)と選択する330または343 mmのローターを基準にブレーキバランスを計画してください。バイアスバルブまたはプロポーショニング調整を推奨します。
17インチ以上のホイールが必要です。最終的なクリアランスはホイールオフセット、スポーク形状、ローター径によって異なります。適合確認の際にホイールスペックをお送りいただければ、TTSPORTが確認いたします。
1つの鍛造キャリパーで両方の回路を処理するため、ばね下質量が少なく、ブラケット形状がシンプルになり、2つの別々のキャリパーマウントとパッドセットではなく、1つのローター面を熱管理すれば済みます。
いいえ。ブラケット、ハットオフセット、ブレーキラインの継手はお客様のシャシーに合わせて製作されます。お客様固有のリアアップライトにキットが正しく合うよう、生産前にエンジニアリングワークフローが必要です。
0~600 °C、平均摩擦係数はμ ≈ 0.38です。冷間発進から繰り返しの競技走行まで対応し、セッション途中で急激な性能低下はありません。
シャシー、リアハブ、ホイールの詳細、油圧ハンドブレーキのレイアウト、リアアップライトの情報をお送りください。TTSPORTがDR4+2リアキットの適合プランをご提案します。
Brake Kits · Fitment · Installation · Care Guide
A brake kit is not just a pair of larger calipers. Calipers, rotors, pads, hoses, brackets, rotor hats, mounting hardware, brake fluid, wheel clearance, and bedding procedure all work together as one system.
This guide explains how to confirm the right TTSPORT brake kit before ordering, what to check before installation, and how to care for the system after installation.
Do not order a brake kit by vehicle name alone. The correct kit depends on the vehicle, axle position, wheel package, driving use, and brake system layout.
Wheel Clearance & Data Disclaimer: Technical fitment data applies strictly to rotor hats and mounting brackets—not wheel geometry. Wheel compatibility specs are provided for general reference only. Insufficient wheel clearance is not covered under warranty or data accuracy claims; if clearance is insufficient, wheel spacers must be added at the customer's discretion.
Different TTSPORT brake kit series use different hardware layouts. Always confirm what the kit includes before purchase.
Use direct-mount calipers and one-piece rotors where specified. These kits do not use rotor hats or caliper brackets unless the final product page clearly states otherwise.
Use separate friction rings and rotor hats. Hat offset, ring bolt pattern, hardware style, and rotor direction must be matched correctly.
May require bespoke brackets, rotor hats, brake lines, and engineering confirmation based on knuckle, hub, wheel, and competition use.
Require extra attention to wheel clearance, tire size, vehicle load, descent control, hose routing, and dust / water exposure.
Do not assume every brake kit includes the same parts. Package contents vary by product series, vehicle application, and final order configuration.
Before finalizing the order, review the kit specification carefully. Confirm the brake kit is matched to your vehicle and wheel setup, not only to the model name.
If any part is not listed in the final order or product page, do not assume it is included.
Inspect every component before installation. Do not modify, grind, drill, stretch, force, or space brake kit components to make them fit.
Safety: Brake kits affect braking force, hydraulic sealing, heat control, wheel clearance, and vehicle stability. Do not install the kit if fitment, torque, direction, clearance, or compatibility is unclear.
Correct installation is as important as the brake kit itself. A properly engineered kit can still perform poorly if installed with dirty mounting faces, incorrect torque, poor hose routing, or trapped air in the hydraulic system.
Verify caliper centering over the rotor and confirm even pad sweep across the friction surface.
Confirm left / right rotor direction if the rotor uses directional vanes or directional face pattern.
Check brake hose length and routing at full steering lock and full suspension travel. No twisting, rubbing, stretching, or kinking.
Check caliper-to-spoke and caliper-to-barrel clearance before road use. Wheel specs are for general estimation only—clearance issues are excluded from warranty/data claims and may require user-supplied wheel spacers.
Use the correct brake fluid type and bleed the system until pedal feel is firm and consistent.
Torque all brake hardware to the specified value. Do not reuse damaged, unknown, stretched, or corroded safety-critical fasteners.
Brake pads and rotors need a controlled bedding process before full performance is available. Bedding helps create an even transfer layer on the rotor surface, improving bite, pedal consistency, and vibration resistance.
Street pads, race pads, iron rotors, two-piece rotors, and carbon ceramic rotors may require different bedding procedures. Use the procedure supplied with the specific kit.
After installation and bedding, give the system a short break-in period before aggressive use. Pedal feel, pad contact, dust output, and noise may continue to settle after the first drives.
Brake kits need regular inspection, especially after track use, off-road use, towing, mountain driving, winter salt exposure, or any brake service.
Inspect pads, rotors, fluid level, and hose condition during normal service intervals. Prioritize quiet operation, smooth pedal feel, and even wear.
Check pad thickness, rotor surface condition, and fluid condition more often. Long descents create sustained heat even without track use.
Inspect for mud, sand, stone impact, hose abrasion, dust boot damage, and caliper contamination after trail use.
Inspect pads, rotors, fluid, and hardware before and after every event. Track heat shortens service intervals.
Check rear brake temperature, hydraulic handbrake behavior, pad wear, rotor cracking, and hardware condition frequently.
Use only compatible pads and approved bedding procedures. Inspect rotor surface condition carefully and avoid incompatible friction materials.
Do not continue driving if the brake system shows any of the following symptoms. Inspect the system or contact a qualified brake technician before using the vehicle again.
Send your vehicle details, brake kit series, wheel specs, driving use, photos, and any symptoms you notice. TTSPORT will help confirm fitment, installation checks, and the correct care path for your brake kit.
購読ありがとうございます!
このメールアドレスは登録されました!