


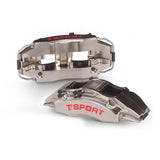


單卡鉗雙回路佈局
一個鍛造卡鉗同時處理手刹和腳刹回路,較堆疊次級卡鉗的佈局更簡潔。
電子郵件:sales@ttsport-racing.com
貨幣
 AED
AED
 AFN
AFN
 ALL
ALL
 AMD
AMD
 ANG
ANG
 AUD
AUD
 AWG
AWG
 AZN
AZN
 BAM
BAM
 BBD
BBD
 BDT
BDT
 BIF
BIF
 BND
BND
 BOB
BOB
 BSD
BSD
 BWP
BWP
 BZD
BZD
 CAD
CAD
 CDF
CDF
 CHF
CHF
 CNY
CNY
 CRC
CRC
 CVE
CVE
 CZK
CZK
 DJF
DJF
 DKK
DKK
 DOP
DOP
 DZD
DZD
 EGP
EGP
 ETB
ETB
 EUR
EUR
 FJD
FJD
 FKP
FKP
 GBP
GBP
 GMD
GMD
 GNF
GNF
 GTQ
GTQ
 GYD
GYD
 HKD
HKD
 HNL
HNL
 HUF
HUF
 IDR
IDR
 ILS
ILS
 INR
INR
 ISK
ISK
 JMD
JMD
 JPY
JPY
 KES
KES
 KGS
KGS
 KHR
KHR
 KMF
KMF
 KRW
KRW
 KYD
KYD
 KZT
KZT
 LAK
LAK
 LBP
LBP
 LKR
LKR
 MAD
MAD
 MDL
MDL
 MKD
MKD
 MMK
MMK
 MNT
MNT
 MOP
MOP
 MUR
MUR
 MVR
MVR
 MWK
MWK
 MYR
MYR
 NGN
NGN
 NIO
NIO
 NPR
NPR
 NZD
NZD
 PEN
PEN
 PGK
PGK
 PHP
PHP
 PKR
PKR
 PLN
PLN
 PYG
PYG
 QAR
QAR
 RON
RON
 RSD
RSD
 RWF
RWF
 SAR
SAR
 SBD
SBD
 SEK
SEK
 SGD
SGD
 SHP
SHP
 SLL
SLL
 STD
STD
 THB
THB
 TJS
TJS
 TOP
TOP
 TTD
TTD
 TWD
TWD
 TZS
TZS
 UAH
UAH
 UGX
UGX
 USD
USD
 UYU
UYU
 UZS
UZS
 VND
VND
 VUV
VUV
 WST
WST
 XAF
XAF
 XCD
XOF
XPF
XCD
XOF
XPF
 YER
YER
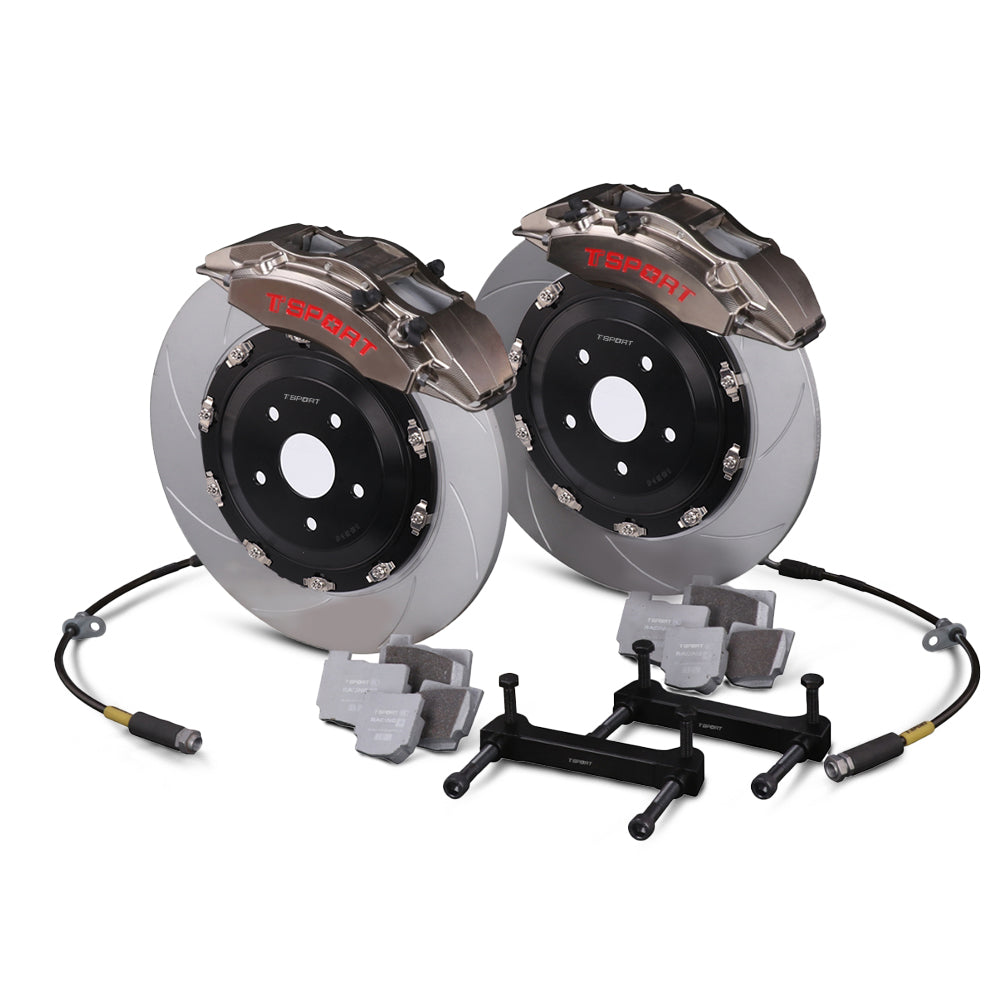
賽道系列 · Drift · 後軸 · 雙回路6活塞
DR4+2 是一款以一個鍛造卡鉗為核心,具有兩個獨立液壓回路的後漂移大制動套件——一個回路用於手刹側,另一個回路用於腳刹側。每個角落配備一個卡鉗、一個轉子、一個支架。沒有堆疊的次級卡鉗,也沒有在踏板和手刹之間共享液壓路徑。
在後懸掛上堆疊第二個卡鉗固然可行,但會增加質量、複雜轉子間隙,並對支架幾何形狀造成妥協。DR4+2 將兩個回路整合在一個雙件鍛造主體內,讓手刹能在需要時鎖定後軸,同時腳刹保持隔離,以提升踏板感受和門檻調節。
一個鍛造卡鉗同時處理手刹和腳刹回路,較堆疊次級卡鉗的佈局更簡潔。
手刹線壓不會污染腳刹踏板感受,因此後鎖定和踏板調節保持分離。
每個角落一個徑向安裝的卡鉗,比雙卡鉗設計更整潔,並簡化支架幾何。
雙件鍛造鋁合金轉子帽,重量約2.50公斤,鍍鎳處理,無防塵套的賽車用活塞以促進散熱和維修便利。
專為需要手刹鎖定、腳刹控制及在高溫條件下重複保持後輪抓地力的後軸設計。
支架幾何、轉子帽偏移、輪轂定位、硬體和制動管路配件在出廠前都會與您的底盤確認匹配。
| 制動卡鉗 | ||
|---|---|---|
| 系列 | 賽車系列——漂移 | |
| 型號 / 適用範圍 | DR4+2 | |
| 軸位置 | 後方 | |
| 卡钳布局 | 單後卡鉗,具有兩個獨立液壓回路 | |
| 活塞數量 | 4個手煞車活塞 + 2個液壓活塞 | |
| 活塞類型 | 無塵罩的賽車活塞 | |
| 活塞直徑 | 27 mm × 2 / 32 mm × 2 / 38 mm × 2 | |
| 卡鉗尺寸 | 長266 毫米 × 寬118 毫米 × 高73 毫米 | |
| 總活塞面積 | 每個卡鉗50.2平方公分,所有活塞總和 | |
| 製造工藝 | 雙片鍛造鋁合金本體 | |
| 淨重 | 每個卡鉗重 2.50 公斤,不含制動片 | |
| 表面處理 | 镍镀层 | |
| 建議輪圈尺寸 | 17英寸或更大 | |
| 推薦轉子尺寸 | Ø330–343 毫米 × 11.5–12 毫米 | |
| 煞車盤選項 | ||
| 轉子選項 | 330 毫米 鋼制 | 343 毫米 鋼制 |
| 制動盤材質 | 熱處理高碳鑄鐵 | 熱處理高碳鑄鐵 |
| 軸位置 | 後方 | 後方 |
| 轉子尺寸 | Ø330 毫米 × 12 毫米 | Ø343 毫米 × 11.5 毫米 |
| 結構 | 雙片式轉子組件 | 雙片式轉子組件 |
| 通風設計 | 實心 | 實心 |
| 轉子安裝方式 | 固定 | 固定 |
| 轉子帽 | CNC加工高強度鋁合金制動盤帽 | CNC加工高強度鋁合金制動盤帽 |
| 方向性設計 | 是 — 左右專用 | 是 — 左右專用 |
| 轉子面板圖案 | 弧形槽 | 弧形槽 |
| 推薦用途 | 適用於17吋輪圈和緊湊懸掛佈局的標準後漂移轉子 | 較大的掃掠面積,適合高速進入和長時間耐熱 |
| 制動皮套 | ||
| 兼容轉子材料 | 鐵/鋼轉子專用 | |
| 工作溫度範圍 | 0–600 °C | |
| 平均摩擦係數 | μ ≈ 0.38,隨溫度、管路壓力和轉子狀況而變化 | |
| 制動片窗口 | 從冷啟動到多次比賽中保持穩定的後輪抓地力,無中途明顯下降 | |
| 制動管線、支架與維護 | ||
| 制動油管結構 | 三層加強 | |
| 刹車油管材質 | PTFE內襯 / SUS304不銹鋼編織 / PVC外護套 | |
| 卡尺安裝 | 徑向安裝,配合車輛專用卡鉗支架 | |
| 卡尺支架 | CNC加工的碳鋼徑向支架卡鉗支架 | |
| 轉子帽 | CNC加工高強度鋁合金轉子帽,與後輪轂幾何和轉子偏移匹配 | |
| 制動管接頭 | 車輛專用——卡鉗側與底盤側的配件根據應用不同而變化 | |
| 回路佈局 | 一個卡鉗內含兩個獨立液壓回路;手刹線壓不影響腳刹踏板感受 | |
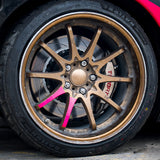
| 輪圈空隙 | 需配備17吋或更大輪圈;最終間隙取決於輪圈偏移、輪輻輪廓、轉子直徑、後輪轂位置和支架幾何 | |
| 預熱程序 | 比賽前必須完成 | |
兩種轉子尺寸均以雙件組裝方式出貨,配備CNC鋁合金帽。可根據工程流程定制帽偏移和支架幾何。最終轉子選擇在組裝檢討時確認。
兩個DR4+2後雙件鍛造雙回路卡鉗,鍍鎳處理,每個後角一個。
適用於後卡鉗的煞車片,額定溫度範圍0–600°C,適用於鐵或鋼轉子。
2個後雙片實心轉子,尺寸選擇為Ø330毫米×12毫米或Ø343毫米×11.5毫米,左右專用。
專為車輛定制的CNC加工碳鋼徑向卡鉗支架,用於正確定位和對齊後卡鉗。
高強度鋁合金轉子帽經CNC加工,與後輪毂幾何和轉子偏移相匹配。
專為車輛設計的不銹鋼編織後煞車油管,內層為PTFE,外層為SUS304編織和PVC外護套,適用於獨立液壓回路。
每個DR4+2後漂移系統都圍繞車輛的後擺臂、輪轂位置、轉子帽偏移、輪圈、輪輻間隙、液壓手煞車佈局、煞車油管走線、後偏策略以及預期的漂移、拉力賽或時間攻擊用途進行設計。目標不是通用適配,而是提供一個能將手煞車壓力與腳煞車壓力隔離,同時完美貼合您底盤幾何的單卡鉗後部套件。
我們會審查底盤、後懸掛和擺臂設置、後輪毂規格、液壓手煞車佈局、後煞車行為目標、輪圈配置、輪胎配置、煞車偏壓策略,以及車輛是否使用原廠或定制的後擺臂。
對於原廠擺臂,請提供底盤詳情、後輪毂規格、輪圈尺寸、偏移、輪輻輪廓和手煞車管路佈局。對於定制後擺臂,請提供CAD文件、技術圖紙、輪毂面數據、轉子安裝尺寸或精確的卡鉗安裝點測量值。
TTSPORT在生產前確認支架幾何形狀、轉子帽偏移、輪轂定位、轉子尺寸、硬件、煞車油管接頭、輪圈間隙和煞車片配置。
如果您不確定您的輪圈、後擺臂、轉子偏移、液壓手煞車佈局、煞車偏壓或煞車油管走線是否適合, 聯繫我們 請在訂購前提供,以便工程團隊審查您的建構細節。
賽車用途。 活塞出廠不配備防塵套,煞車片則為適用高溫的配方。需進行磨合。此套件並非日常街車升級產品。
不。DR4+2 在一個卡鉗體內有兩個獨立的液壓回路。手煞車油壓不影響腳煞車踏板的感覺,反之亦然。
是的,但後偏會改變。請根據您選擇的後輪活塞面積(每個卡鉗50.2平方厘米)以及330或343毫米的轉子來規劃煞車平衡。建議使用偏壓閥或比例調整裝置。
需要17英寸或更大輪圈。最終間隙取決於輪圈偏距、辐條輪廓和制動盤直徑。在安裝評審時提供輪圈規格,TTSPORT將予以確認。
一個鍛造卡鉗可控制兩個回路,因此質量較少,支架幾何更簡單,且只需管理一個制動盤面,無需處理兩個獨立的卡鉗支架和墊片組。
不可以。支架、帽偏移和剎車線接頭是根據您的底盤定製的。在正式生產前需要進行工程流程,以確保套件能正確配合您的特定後懸架。
0–600°C,平均摩擦係數約μ ≈ 0.38。這涵蓋了冷啟動到多次比賽跑動中的熱管理,無中途明顯性能下降。
請提供您的底盤、後輪毂、輪圈詳情、液壓手刹佈局和後立柱信息。TTSPORT將提供適合DR4+2後套件的安裝方案。
Brake Kits · Fitment · Installation · Care Guide
A brake kit is not just a pair of larger calipers. Calipers, rotors, pads, hoses, brackets, rotor hats, mounting hardware, brake fluid, wheel clearance, and bedding procedure all work together as one system.
This guide explains how to confirm the right TTSPORT brake kit before ordering, what to check before installation, and how to care for the system after installation.
Do not order a brake kit by vehicle name alone. The correct kit depends on the vehicle, axle position, wheel package, driving use, and brake system layout.
Brake kits are application-specific. A visually similar kit can still have the wrong rotor offset, bracket geometry, hose fitting, caliper position, or wheel clearance requirement.
Different TTSPORT brake kit series use different hardware layouts. Always confirm what the kit includes before purchase.
Use direct-mount calipers and one-piece rotors where specified. These kits do not use rotor hats or caliper brackets unless the final product page clearly states otherwise.
Use separate friction rings and rotor hats. Hat offset, ring bolt pattern, hardware style, and rotor direction must be matched correctly.
May require bespoke brackets, rotor hats, brake lines, and engineering confirmation based on knuckle, hub, wheel, and competition use.
Require extra attention to wheel clearance, tire size, vehicle load, descent control, hose routing, and dust / water exposure.
Do not assume every brake kit includes the same parts. Package contents vary by product series, vehicle application, and final order configuration.
Before finalizing the order, review the kit specification carefully. Confirm the brake kit is matched to your vehicle and wheel setup, not only to the model name.
If any part is not listed in the final order or product page, do not assume it is included.
Inspect every component before installation. Do not modify, grind, drill, stretch, force, or space brake kit components to make them fit.
Safety: Brake kits affect braking force, hydraulic sealing, heat control, wheel clearance, and vehicle stability. Do not install the kit if fitment, torque, direction, clearance, or compatibility is unclear.
Correct installation is as important as the brake kit itself. A properly engineered kit can still perform poorly if installed with dirty mounting faces, incorrect torque, poor hose routing, or trapped air in the hydraulic system.
Verify caliper centering over the rotor and confirm even pad sweep across the friction surface.
Confirm left / right rotor direction if the rotor uses directional vanes or directional face pattern.
Check brake hose length and routing at full steering lock and full suspension travel. No twisting, rubbing, stretching, or kinking.
Check caliper-to-spoke and caliper-to-barrel clearance before road use. Wheel diameter alone is not enough.
Use the correct brake fluid type and bleed the system until pedal feel is firm and consistent.
Torque all brake hardware to the specified value. Do not reuse damaged, unknown, stretched, or corroded safety-critical fasteners.
Brake pads and rotors need a controlled bedding process before full performance is available. Bedding helps create an even transfer layer on the rotor surface, improving bite, pedal consistency, and vibration resistance.
Street pads, race pads, iron rotors, two-piece rotors, and carbon ceramic rotors may require different bedding procedures. Use the procedure supplied with the specific kit.
After installation and bedding, give the system a short break-in period before aggressive use. Pedal feel, pad contact, dust output, and noise may continue to settle after the first drives.
Brake kits need regular inspection, especially after track use, off-road use, towing, mountain driving, winter salt exposure, or any brake service.
Inspect pads, rotors, fluid level, and hose condition during normal service intervals. Prioritize quiet operation, smooth pedal feel, and even wear.
Check pad thickness, rotor surface condition, and fluid condition more often. Long descents create sustained heat even without track use.
Inspect for mud, sand, stone impact, hose abrasion, dust boot damage, and caliper contamination after trail use.
Inspect pads, rotors, fluid, and hardware before and after every event. Track heat shortens service intervals.
Check rear brake temperature, hydraulic handbrake behavior, pad wear, rotor cracking, and hardware condition frequently.
Use only compatible pads and approved bedding procedures. Inspect rotor surface condition carefully and avoid incompatible friction materials.
Do not continue driving if the brake system shows any of the following symptoms. Inspect the system or contact a qualified brake technician before using the vehicle again.
Send your vehicle details, brake kit series, wheel specs, driving use, photos, and any symptoms you notice. TTSPORT will help confirm fitment, installation checks, and the correct care path for your brake kit.
感謝您的訂閱!
此電子郵件已被註冊!