


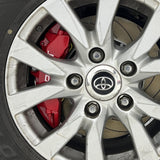


การติดตั้งตรงหน้าแบบพอดี
การกำหนดค่าการติดตั้งแบบเฉพาะรถสำหรับเพลาหน้าของ Toyota Land Cruiser 200 / LC200 / J200 และ Lexus LX570
อีเมล: sales@ttsport-racing.com
สกุลเงิน
 AED
AED
 AFN
AFN
 ALL
ALL
 AMD
AMD
 ANG
ANG
 AUD
AUD
 AWG
AWG
 AZN
AZN
 BAM
BAM
 BBD
BBD
 BDT
BDT
 BIF
BIF
 BND
BND
 BOB
BOB
 BSD
BSD
 BWP
BWP
 BZD
BZD
 CAD
CAD
 CDF
CDF
 CHF
CHF
 CNY
CNY
 CRC
CRC
 CVE
CVE
 CZK
CZK
 DJF
DJF
 DKK
DKK
 DOP
DOP
 DZD
DZD
 EGP
EGP
 ETB
ETB
 EUR
EUR
 FJD
FJD
 FKP
FKP
 GBP
GBP
 GMD
GMD
 GNF
GNF
 GTQ
GTQ
 GYD
GYD
 HKD
HKD
 HNL
HNL
 HUF
HUF
 IDR
IDR
 ILS
ILS
 INR
INR
 ISK
ISK
 JMD
JMD
 JPY
JPY
 KES
KES
 KGS
KGS
 KHR
KHR
 KMF
KMF
 KRW
KRW
 KYD
KYD
 KZT
KZT
 LAK
LAK
 LBP
LBP
 LKR
LKR
 MAD
MAD
 MDL
MDL
 MKD
MKD
 MMK
MMK
 MNT
MNT
 MOP
MOP
 MUR
MUR
 MVR
MVR
 MWK
MWK
 MYR
MYR
 NGN
NGN
 NIO
NIO
 NPR
NPR
 NZD
NZD
 PEN
PEN
 PGK
PGK
 PHP
PHP
 PKR
PKR
 PLN
PLN
 PYG
PYG
 QAR
QAR
 RON
RON
 RSD
RSD
 RWF
RWF
 SAR
SAR
 SBD
SBD
 SEK
SEK
 SGD
SGD
 SHP
SHP
 SLL
SLL
 STD
STD
 THB
THB
 TJS
TJS
 TOP
TOP
 TTD
TTD
 TWD
TWD
 TZS
TZS
 UAH
UAH
 UGX
UGX
 USD
USD
 UYU
UYU
 UZS
UZS
 VND
VND
 VUV
VUV
 WST
WST
 XAF
XAF
 XCD
XOF
XPF
XCD
XOF
XPF
 YER
YER
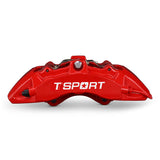
ซีรีส์ติดตั้งโดยตรง · เพลาหน้า · คาลิปเปอร์ 6 ลูกสูบ
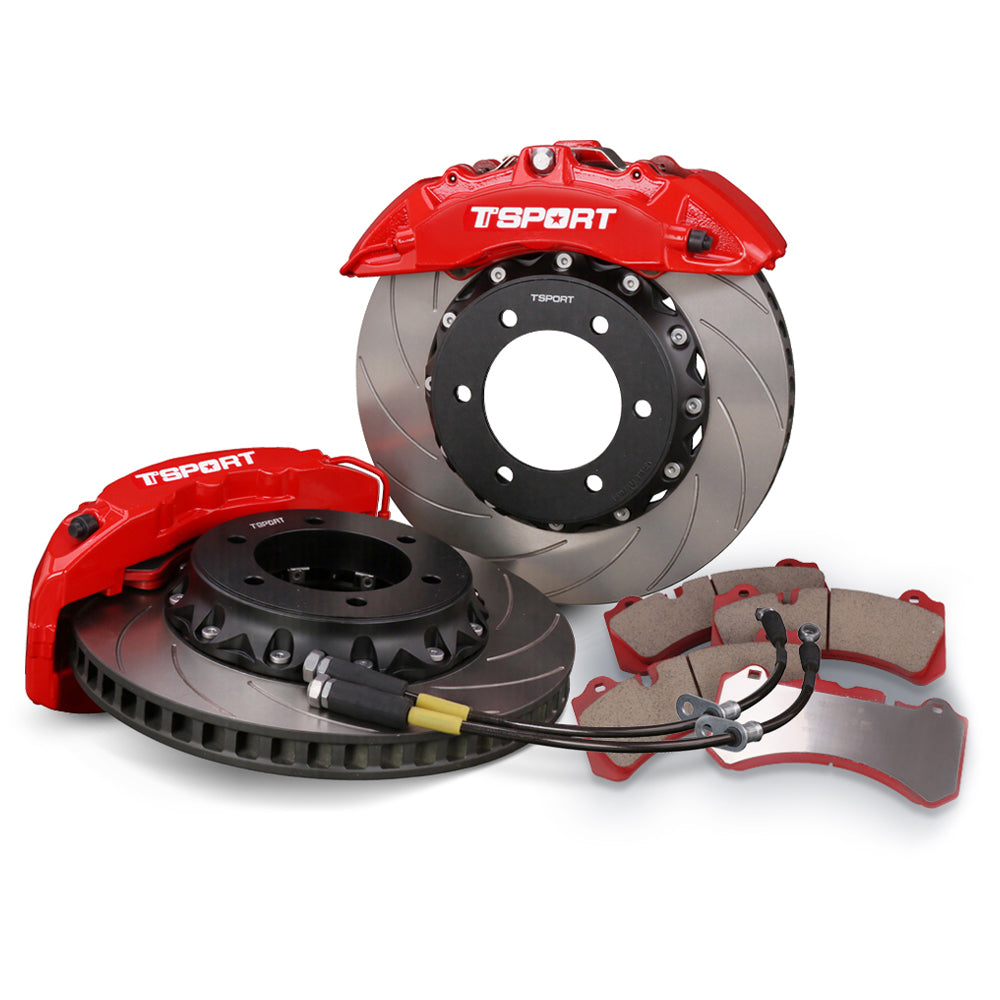
ชุดเบรกใหญ่ด้านหน้ารุ่น TTSPORT AR6 Direct-Mount Series ถูกออกแบบสำหรับ Toyota Land Cruiser 200 / LC200 / J200 และ Lexus LX570 ที่ต้องการเบรกหน้าที่แข็งแรงขึ้นในงานลากจูง น้ำหนักบรรทุก ยางขนาดใหญ่ การติดตั้งเกราะหลังคา และการใช้งานลงเขาซ้ำๆ คู่กับคาลิปเปอร์แบบหล่อขึ้นรูป 6 ลูกสูบ พร้อมชุดโรเตอร์หน้าสองชิ้น Ø362 มม. × 32 มม., สายเบรกแบบถักสแตนเลส และอุปกรณ์เชื่อมต่อเฉพาะรถเพื่อการตอบสนองแป้นเบรกที่แน่นหนาและคาดการณ์ได้
รถ SUV โครงสร้างตัวถังหนาแน่นขนาดใหญ่สร้างภาระเบรกเพลาหน้าสูงเมื่อใส่ยางขนาดใหญ่ กันชนเหล็ก ลิ้นชัก อุปกรณ์บนหลังคา รถพ่วง หรืออุปกรณ์กู้ภัย ชุด AR6 ช่วยเพิ่มความแข็งแรงของคาลิปเปอร์ พื้นที่ลูกสูบ เส้นผ่านศูนย์กลางโรเตอร์ และความสามารถในการระบายความร้อน ในขณะเดียวกันก็ยังคงเป็นระบบแบบติดตั้งตรงและเฉพาะรถ
การกำหนดค่าการติดตั้งแบบเฉพาะรถสำหรับเพลาหน้าของ Toyota Land Cruiser 200 / LC200 / J200 และ Lexus LX570
ชุดโรเตอร์แบบสองชิ้นทำจากอลูมิเนียมหล่อ พร้อมลูกสูบฉนวนความร้อนขนาด 30 มม. × 2 / 34 มม. × 2 / 38 มม. × 2 และฝาปิดกันฝุ่น
พื้นที่ลูกสูบรวม 55.0 ตร.ซม. ต่อคาลิปเปอร์ ช่วยให้แรงบีบคั้นควบคุมได้ดีสำหรับภาระเบรกด้านหน้าที่หนักขึ้น
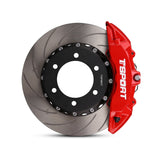
ชุดโรเตอร์หน้าที่มีช่องระบายอากาศภายใน Ø362 มม. × 32 มม. พร้อมการติดตั้งแบบคงที่ ดีไซน์ทิศทาง และลายหน้ากระดูกงูโค้ง
AR6 ต้องใช้ล้อขนาด 17 นิ้วขึ้นไป และมีระยะช่องว่างระหว่างก้านสูบอย่างน้อย 102 มม. เพื่อให้เข้ากับคาลิปเปอร์ด้านหน้า
ภายในเป็นชั้น PTFE, สายไฟเบอร์ SUS304 สแตนเลส และเปลือกนอกป้องกัน PVC ช่วยลดการขยายตัวของสายยางภายใต้แรงเบรก
| คาลิปเปอร์เบรก | |
|---|---|
| ซีรีส์ | ซีรีส์แบบติดตรง |
| รุ่น / การใช้งาน | AR6 |
| ตำแหน่งเพลาขับ | ด้านหน้า |
| จำนวนลูกสูบ | 6-ปืนก้าน |
| ประเภทลูกสูบ | ลูกสูบฉนวนความร้อนแบบสองชิ้นพร้อมฝาปิดฝุ่น |
| เส้นผ่านศูนย์กลางลูกสูบ | 30 มม. × 2 / 34 มม. × 2 / 38 มม. × 2 |
| ขนาดคาลิปเปอร์ | กว้าง 330 มม. × ยาว 167 มม. × สูง 128 มม. |
| พื้นที่ลูกสูบรวม | 55.0 ตร.ซม. ต่อคาลิปเปอร์ รวมลูกสูบทั้งหมด |
| กระบวนการผลิต | ตัวถังอะลูมิเนียมขึ้นรูปสองชิ้น |
| น้ำหนักสุทธิ | น้ำหนัก 4.45 กก. ต่อคาลิปเปอร์ โดยไม่รวมผ้าเบรก |
| พื้นผิวเคลือบเงา | เคลือบเงาอุณหภูมิสูง |
| ขนาดล้อที่แนะนำ | 17 นิ้วขึ้นไป |
| ขนาดโรเตอร์ที่แนะนำ | Ø362 มม. × 32 มม. |
| โรเตอร์เบรก | |
| วัสดุโรเตอร์ | เหล็กหล่อโครเมียมสูงผ่านการอบความร้อน |
| ตำแหน่งเพลาขับ | ด้านหน้า |
| ขนาดดิสก์สำหรับการใช้งานนี้ | Ø362 มม. × 32 มม. |
| โครงสร้าง | ชุดโรเตอร์แบบสองชิ้น |
| การระบายอากาศ | ระบายอากาศภายใน |
| การติดตั้งโรเตอร์ | คงที่ |
| ดีไซน์ทิศทาง | ใช่ — เฉพาะซ้าย/ขวา |
| ลายบนพื้นผิวโรเตอร์ | ร่องโค้ง |
| ผ้าเบรก | |
| วัสดุโรเตอร์ที่รองรับได้ | โรเตอร์เหล็ก / เหล็กเท่านั้น |
| ช่วงอุณหภูมิการทำงาน | 0–600 °C |
| ค่าเฉลี่ยค่าสัมประสิทธิ์แรงเสียดทาน | ค่า μ เฉลี่ย: 0.38; ความแปรปรวนขึ้นอยู่กับอุณหภูมิ แรงดันสาย และสภาพโรเตอร์ |
| สายเบรก | |
| โครงสร้างสายเบรก | โครงสร้างเสริมสามชั้น |
| วัสดุสายเบรก | แกนใน PTFE / ลวดถักสแตนเลส SUS304 / เปลือกนอกป้องกัน PVC |
| หัวต่อสายเบรก | อุปกรณ์เชื่อมต่อเฉพาะรถยนต์; ข้อต่อด้านคาลิปเปอร์และด้านตัวถังแตกต่างกันไปตามการใช้งาน |
| การใช้งานรถและแผนที่ดิสก์เบรก | |
| Toyota Land Cruiser 200 / LC200 / J200 ปี 2008-2021 | ด้านหน้า · Ø362 มม. × 32 มม. |
| Lexus LX570 ปี 2008-2021 | ด้านหน้า · Ø362 มม. × 32 มม. |
| การติดตั้งและการปรับเข้ากัน | |
| การใช้งานหลักของรถยนต์ | Toyota Land Cruiser 200 / LC200 / J200 ปี 2008-2021 · Lexus LX570 ปี 2008-2021 |
| ปีรุ่น | Toyota LC200: 2008-2021 · Lexus LX570: 2008-2021 |
| เพลา | ด้านหน้า |
| ประเภทการติดตั้งคาลิปเปอร์ | การติดตั้งตรง |
| ขนาดล้อขั้นต่ำ | 17 นิ้วขึ้นไป |
| ระยะห่างของซี่ล้อขั้นต่ำ | 102 มม. |
| ประเภทข้อต่อสายเบรก | อุปกรณ์เชื่อมต่อเฉพาะรถยนต์; ข้อต่อด้านคาลิปเปอร์และด้านตัวถังแตกต่างกันไปตามการใช้งาน |
| การตรวจสอบคำสั่งซื้อ | ตรวจสอบปีรุ่น รุ่นย่อย ชุดเบรกหน้า ขนาดล้อ ระยะช่องว่างระหว่างซี่ล้อ และรูปแบบการเชื่อมต่อสายเบรกก่อนสั่งซื้อ |
| ขั้นตอนการเบรกเบดดิ้ง | จำเป็น |
สำหรับ Toyota LC200 และ Lexus LX570 สเปคโรเตอร์หน้าที่ถูกต้องคือ Ø362 มม. × 32 มม. พร้อมชุดโรเตอร์สองชิ้น ตรวจสอบให้แน่ใจว่าล้อขนาด 17 นิ้วขึ้นไป มีระยะช่องว่างระหว่างซี่ล้อขั้นต่ำ 102 มม. และความเข้ากันได้ของการเชื่อมต่อสายเบรกก่อนสั่งซื้อ
คาลิปเปอร์เบรกหน้าแบบอัลลูมิเนียมหล่อ 6 ก้าน AR6 คู่, สำหรับซ้าย/ขวาโดยเฉพาะ
ผ้าเบรกสำหรับคาลิปเปอร์หน้าทั้งสองข้าง ความสามารถทนความร้อน 0–600 °C และออกแบบสำหรับโรเตอร์เหล็ก / เหล็กกล้า
ชุดโรเตอร์หน้าแบบสองชิ้น Ø362 มม. × 32 มม. จำนวน 2 ชุด, ระบายความร้อนภายใน, ช่องทางโค้ง, สำหรับซ้าย/ขวาโดยเฉพาะ
สายเบรกถักสแตนเลสสามชั้นพร้อมชั้นใน PTFE, สายถัก SUS304, หุ้มป้องกันด้วย PVC, พร้อมอุปกรณ์เชื่อมต่อเฉพาะรถยนต์
อุปกรณ์ติดตั้งแบบตรงเฉพาะสำหรับรถ Toyota LC200 / Lexus LX570 ด้านหน้า
ชุด AR6 เป็นชุดเบรกหน้าแบบติดตั้งตรง ค่ากันเบรกไม่ใช้แคลิปเปอร์บรัชเก็ต ตัวโรเตอร์เป็นแบบสองชิ้น ไม่ใช่โรเตอร์ชิ้นเดียว
AR6 ต้องใช้ล้อขนาด 17 นิ้วขึ้นไป ที่มีระยะห่างระหว่างซี่ล้ออย่างน้อย 102 มม. ขนาดล้อเพียงอย่างเดียวไม่เพียงพอ ต้องตรวจสอบรูปทรงซี่ล้อ, ระยะ offset, การใช้แผ่น spacer, และโปรไฟล์ภายในของบาร์เรลก่อนสั่งซื้อ
ต้องใช้ล้อขนาด 17 นิ้วขึ้นไป
ระยะห่างซี่ล้อขั้นต่ำ: 102 มม. ตรวจสอบรูปทรงซี่ล้อ, ระยะ offset, การใช้ spacer, และโปรไฟล์ภายในของบาร์เรลก่อนสั่งซื้อ
การใช้งาน: ชุดเบรกหน้าสำหรับ Toyota Land Cruiser 200 / LC200 / J200 และ Lexus LX570 ปี 2008-2021 ที่มาพร้อมกับเบรกโรเตอร์ Ø362 มม. × 32 มม.
ส่งปีรุ่น, รุ่นย่อย, รูปภาพอุปกรณ์เบรกหน้า, สเปคล้อ และการใช้งานของคุณก่อนสั่งซื้อ เพื่อให้ TTSPORT ยืนยันความเข้ากันได้
ใช่ ชุด AR6 แบบติดตั้งตรงนี้ถูกออกแบบสำหรับ Toyota Land Cruiser 200 / LC200 / J200 และ Lexus LX570 ปี 2008-2021 สเปคโรเตอร์หน้าที่ถูกต้องคือ Ø362 มม. × 32 มม.
เป็นชุดเพลาหน้าขนาด Ø362 มม. × 32 มม. แบบสองชิ้น ที่ระบายอากาศภายใน และเป็นแบบทิศทาง พร้อมลายหน้าที่เป็นช่องโค้ง
ต้องใช้ล้อขนาด 17 นิ้วขึ้นไป โดยมีระยะห่างของ spoke อย่างน้อย 102 มม. สำหรับเบรกหน้า ขนาดเส้นผ่านศูนย์กลางของล้อเพียงอย่างเดียวไม่เพียงพอ ต้องตรวจสอบรูปทรง spoke การวางตำแหน่ง การใช้ spacer และโปรไฟล์ของ inner barrel ก่อนสั่งซื้อ
AR6 ใช้ชุดโรเตอร์หน้าแบบสองชิ้น ขนาด Ø362 มม. × 32 มม. อย่าอธิบายการใช้งานนี้ว่าเป็นโรเตอร์แบบชิ้นเดียว
ไม่ใช่ นี่คือชุด AR6 ซีรีส์แบบ Direct-Mount ที่ใช้ caliper หน้าแบบ direct-mount และการออกแบบตำแหน่งติดตั้งหน้ารถเฉพาะรุ่น brackets สำหรับ caliper ไม่ได้ใช้ในชุดนี้
ใช่ แผ่นเบรกที่รวมอยู่สามารถใช้งานได้ตั้งแต่ 0–600 °C โดยมีค่า μ เฉลี่ย 0.38 เหมาะสำหรับการขับขี่บนถนน การลากจูง และการใช้งาน SUV ที่บรรทุกน้ำหนักบนโรเตอร์เหล็กหรือเหล็กกล้า
ใช่ จำเป็นต้องทำการเบดดิ้งให้ดีเพื่อถ่ายเทวัสดุของแผ่นเบรกอย่างสม่ำเสมอไปยังผิวหน้าของโรเตอร์ และเพื่อให้ได้ประสิทธิภาพการเบรกที่เสถียร
ต้องการยืนยันการติดตั้งด้านหน้า ตรวจสอบระยะห่างของล้อ หรือชุดเบรกหน้า + หลังที่แมทช์กันหรือไม่?
Brake Kits · Fitment · Installation · Care Guide
A brake kit is not just a pair of larger calipers. Calipers, rotors, pads, hoses, brackets, rotor hats, mounting hardware, brake fluid, wheel clearance, and bedding procedure all work together as one system.
This guide explains how to confirm the right TTSPORT brake kit before ordering, what to check before installation, and how to care for the system after installation.
Do not order a brake kit by vehicle name alone. The correct kit depends on the vehicle, axle position, wheel package, driving use, and brake system layout.
Brake kits are application-specific. A visually similar kit can still have the wrong rotor offset, bracket geometry, hose fitting, caliper position, or wheel clearance requirement.
Different TTSPORT brake kit series use different hardware layouts. Always confirm what the kit includes before purchase.
Use direct-mount calipers and one-piece rotors where specified. These kits do not use rotor hats or caliper brackets unless the final product page clearly states otherwise.
Use separate friction rings and rotor hats. Hat offset, ring bolt pattern, hardware style, and rotor direction must be matched correctly.
May require bespoke brackets, rotor hats, brake lines, and engineering confirmation based on knuckle, hub, wheel, and competition use.
Require extra attention to wheel clearance, tire size, vehicle load, descent control, hose routing, and dust / water exposure.
Do not assume every brake kit includes the same parts. Package contents vary by product series, vehicle application, and final order configuration.
Before finalizing the order, review the kit specification carefully. Confirm the brake kit is matched to your vehicle and wheel setup, not only to the model name.
If any part is not listed in the final order or product page, do not assume it is included.
Inspect every component before installation. Do not modify, grind, drill, stretch, force, or space brake kit components to make them fit.
Safety: Brake kits affect braking force, hydraulic sealing, heat control, wheel clearance, and vehicle stability. Do not install the kit if fitment, torque, direction, clearance, or compatibility is unclear.
Correct installation is as important as the brake kit itself. A properly engineered kit can still perform poorly if installed with dirty mounting faces, incorrect torque, poor hose routing, or trapped air in the hydraulic system.
Verify caliper centering over the rotor and confirm even pad sweep across the friction surface.
Confirm left / right rotor direction if the rotor uses directional vanes or directional face pattern.
Check brake hose length and routing at full steering lock and full suspension travel. No twisting, rubbing, stretching, or kinking.
Check caliper-to-spoke and caliper-to-barrel clearance before road use. Wheel diameter alone is not enough.
Use the correct brake fluid type and bleed the system until pedal feel is firm and consistent.
Torque all brake hardware to the specified value. Do not reuse damaged, unknown, stretched, or corroded safety-critical fasteners.
Brake pads and rotors need a controlled bedding process before full performance is available. Bedding helps create an even transfer layer on the rotor surface, improving bite, pedal consistency, and vibration resistance.
Street pads, race pads, iron rotors, two-piece rotors, and carbon ceramic rotors may require different bedding procedures. Use the procedure supplied with the specific kit.
After installation and bedding, give the system a short break-in period before aggressive use. Pedal feel, pad contact, dust output, and noise may continue to settle after the first drives.
Brake kits need regular inspection, especially after track use, off-road use, towing, mountain driving, winter salt exposure, or any brake service.
Inspect pads, rotors, fluid level, and hose condition during normal service intervals. Prioritize quiet operation, smooth pedal feel, and even wear.
Check pad thickness, rotor surface condition, and fluid condition more often. Long descents create sustained heat even without track use.
Inspect for mud, sand, stone impact, hose abrasion, dust boot damage, and caliper contamination after trail use.
Inspect pads, rotors, fluid, and hardware before and after every event. Track heat shortens service intervals.
Check rear brake temperature, hydraulic handbrake behavior, pad wear, rotor cracking, and hardware condition frequently.
Use only compatible pads and approved bedding procedures. Inspect rotor surface condition carefully and avoid incompatible friction materials.
Do not continue driving if the brake system shows any of the following symptoms. Inspect the system or contact a qualified brake technician before using the vehicle again.
Send your vehicle details, brake kit series, wheel specs, driving use, photos, and any symptoms you notice. TTSPORT will help confirm fitment, installation checks, and the correct care path for your brake kit.
ขอบคุณสำหรับการสมัครสมาชิก!
อีเมลนี้ได้รับการลงทะเบียนแล้ว!